How to Use the Contacts Calendar View
Plan upcoming visits, appointments, and follow-ups from a calendar view of your contacts.
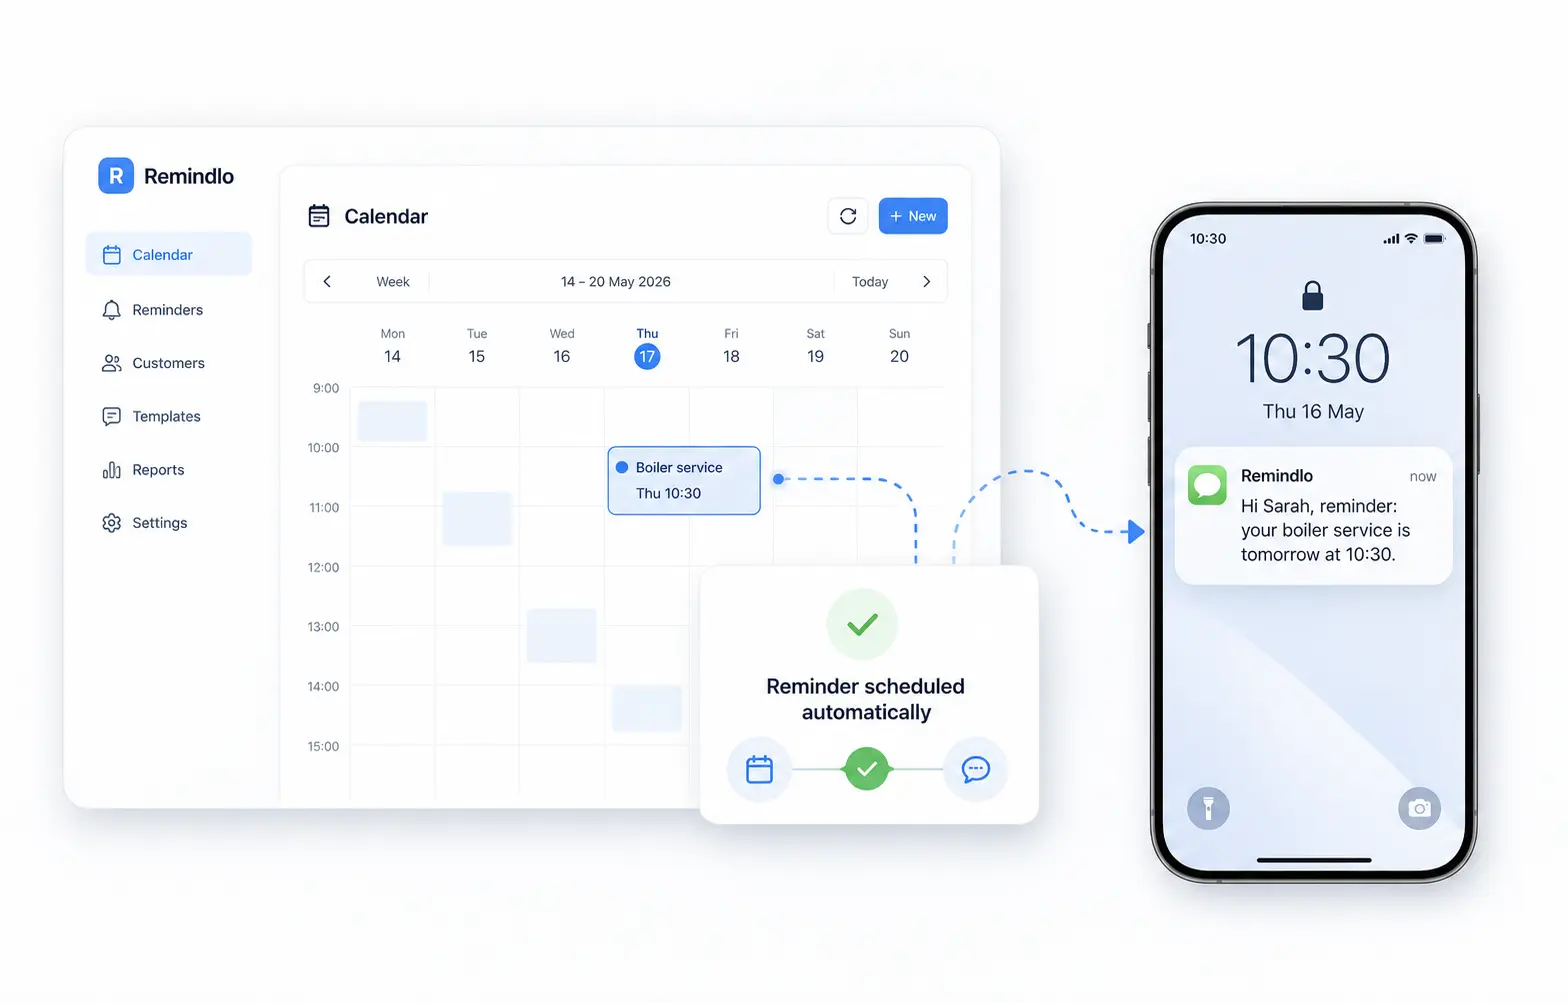
The Contacts calendar gives you another way to work with your Remindlo contacts. Instead of scanning a table, you can see scheduled visits — past and upcoming — placed on a calendar by their start time.
This is useful for service businesses that plan around daily or weekly work: MOT checks, boiler services, dental appointments, beauty bookings, gym follow-ups, renewals, and other recurring customer touchpoints.
Where to Find the Calendar
Open your Remindlo dashboard.
In the sidebar, click Calendar.
The Calendar is a dedicated page alongside Contacts, Campaigns, and the rest of your dashboard. It shows every visit across all of your contacts in one place.

What Appears on the Calendar
The calendar shows your scheduled visits. A contact can have multiple visits over time, and each one appears as its own item on the calendar — so the same contact may appear more than once as you scroll across weeks or months.
If a visit has a specific start time, it appears in that time slot. If no specific time was set, it appears as an all-day item at the top of the day.
Past, upcoming, and cancelled visits all stay on the calendar so you keep a full history. They are rendered differently so the upcoming ones stand out (see Visit States below).
Calendar Views
On desktop, you can use multiple calendar layouts:
Month - best for planning several weeks ahead.
Week - best for seeing your upcoming service schedule.
Day - best for focusing on today's appointments and follow-ups.
List - best for a compact agenda-style view.
The week and day views start around normal working hours, so you do not need to scroll past the quiet overnight period before seeing your main appointments.
Using the Calendar on Mobile
On mobile, the calendar opens directly in month view. Visits show up as small coloured dots on each day so the grid stays readable on a narrow screen. Tap a date to navigate, or tap a visit to open it for editing.
Add a Visit from the Calendar
You can add a visit directly from the calendar:
Click or tap the date when the visit should happen.
In week or day view, click the specific time slot if you want to set a start time.
The Add visit dialog opens with the date and time already filled in.
Pick an existing contact from the search box, or create a new one inline — then fill in the visit details and save.
Open and Edit a Visit
Click any visit on the calendar to open the Edit visit dialog. From there you can change the date or time, update the title, location, or notes, or change the status to cancelled.
Campaign assignment and recurrence settings belong to the contact, not to a single visit — update them from the contact's Edit form in Contacts.
After saving, the calendar refreshes so the visit appears in the correct place.
Visit States
The calendar uses three visual states so you can tell at a glance what each visit means:
Scheduled / confirmed — solid coloured tile. These are the visits you should be planning around.
Past — same colour but slightly faded. The visit has already happened.
Cancelled — muted grey tile with the contact name struck through. Cancelled visits stay on the calendar so you keep the history; they will not trigger any further reminders.
Campaign Status Icons
Each upcoming visit shows a small icon next to the contact name:
Message icon — the contact is in at least one campaign, so reminders will be sent.
Warning icon — the contact is not currently in any campaign, so no automated reminder will go out for this visit.
Cancelled visits do not show this icon — no reminder will fire either way, so the strike-through alone is enough.
The warning icon is especially useful when reviewing upcoming work. It helps you spot visits whose contact may need to be added to a campaign before the date arrives.
Timezone and Date Format
The calendar uses your Remindlo account timezone, not the timezone of the device you happen to be using. This helps keep appointment times consistent if you log in while travelling or if a team member opens the dashboard from a different location.
Date and time formatting follows your account's country settings, matching the way dates are shown across the rest of the dashboard.
Best Practices
Review the warning icons regularly — they show upcoming visits whose contact is not in any campaign.
Use week view for operations — it gives a clear view of the next few working days.
Use month view for planning — it is better for spotting busy periods and upcoming renewals.
Add specific times where possible — timed visits are easier to plan around than all-day items.
Cancel rather than delete — cancelling a visit keeps it on the calendar with a strike-through, so you keep an audit of what was originally booked.
Keep recurrence updated on the contact — recurring contacts are easier to manage when their interval matches the real service cycle.
Troubleshooting
A visit is missing from the calendar
Open the contact and check that the visit was saved.
Navigate to the correct month, week, or day — the calendar only loads visits in the visible range.
If the visit was cancelled, look for the struck-through grey tile rather than a coloured one.
The time looks wrong
Check your account timezone in Settings.
Make sure the visit was saved with the intended start time, not as an all-day item.
A visit has a warning icon
The contact attached to the visit is not currently assigned to any campaign.
Open the contact and add it to a campaign if you want Remindlo to send automated reminders.
Need Help?
If you need help using the calendar, contact us at support@remindlo.co.uk.